Tags
How to Create and Assign Tags
Section titled “How to Create and Assign Tags”Tags help organize and categorize Test Cases and Suites for easier filtering, reporting, and management. You can create tags directly in titles or assign them in bulk using the multiselect feature. Tags applied at the Suite or Folder level automatically propagate to nested items, ensuring consistent organization across your project.
Create Tags via Title Field
Section titled “Create Tags via Title Field”You can easily create tags directly to Test Cases or Suites via their titles.
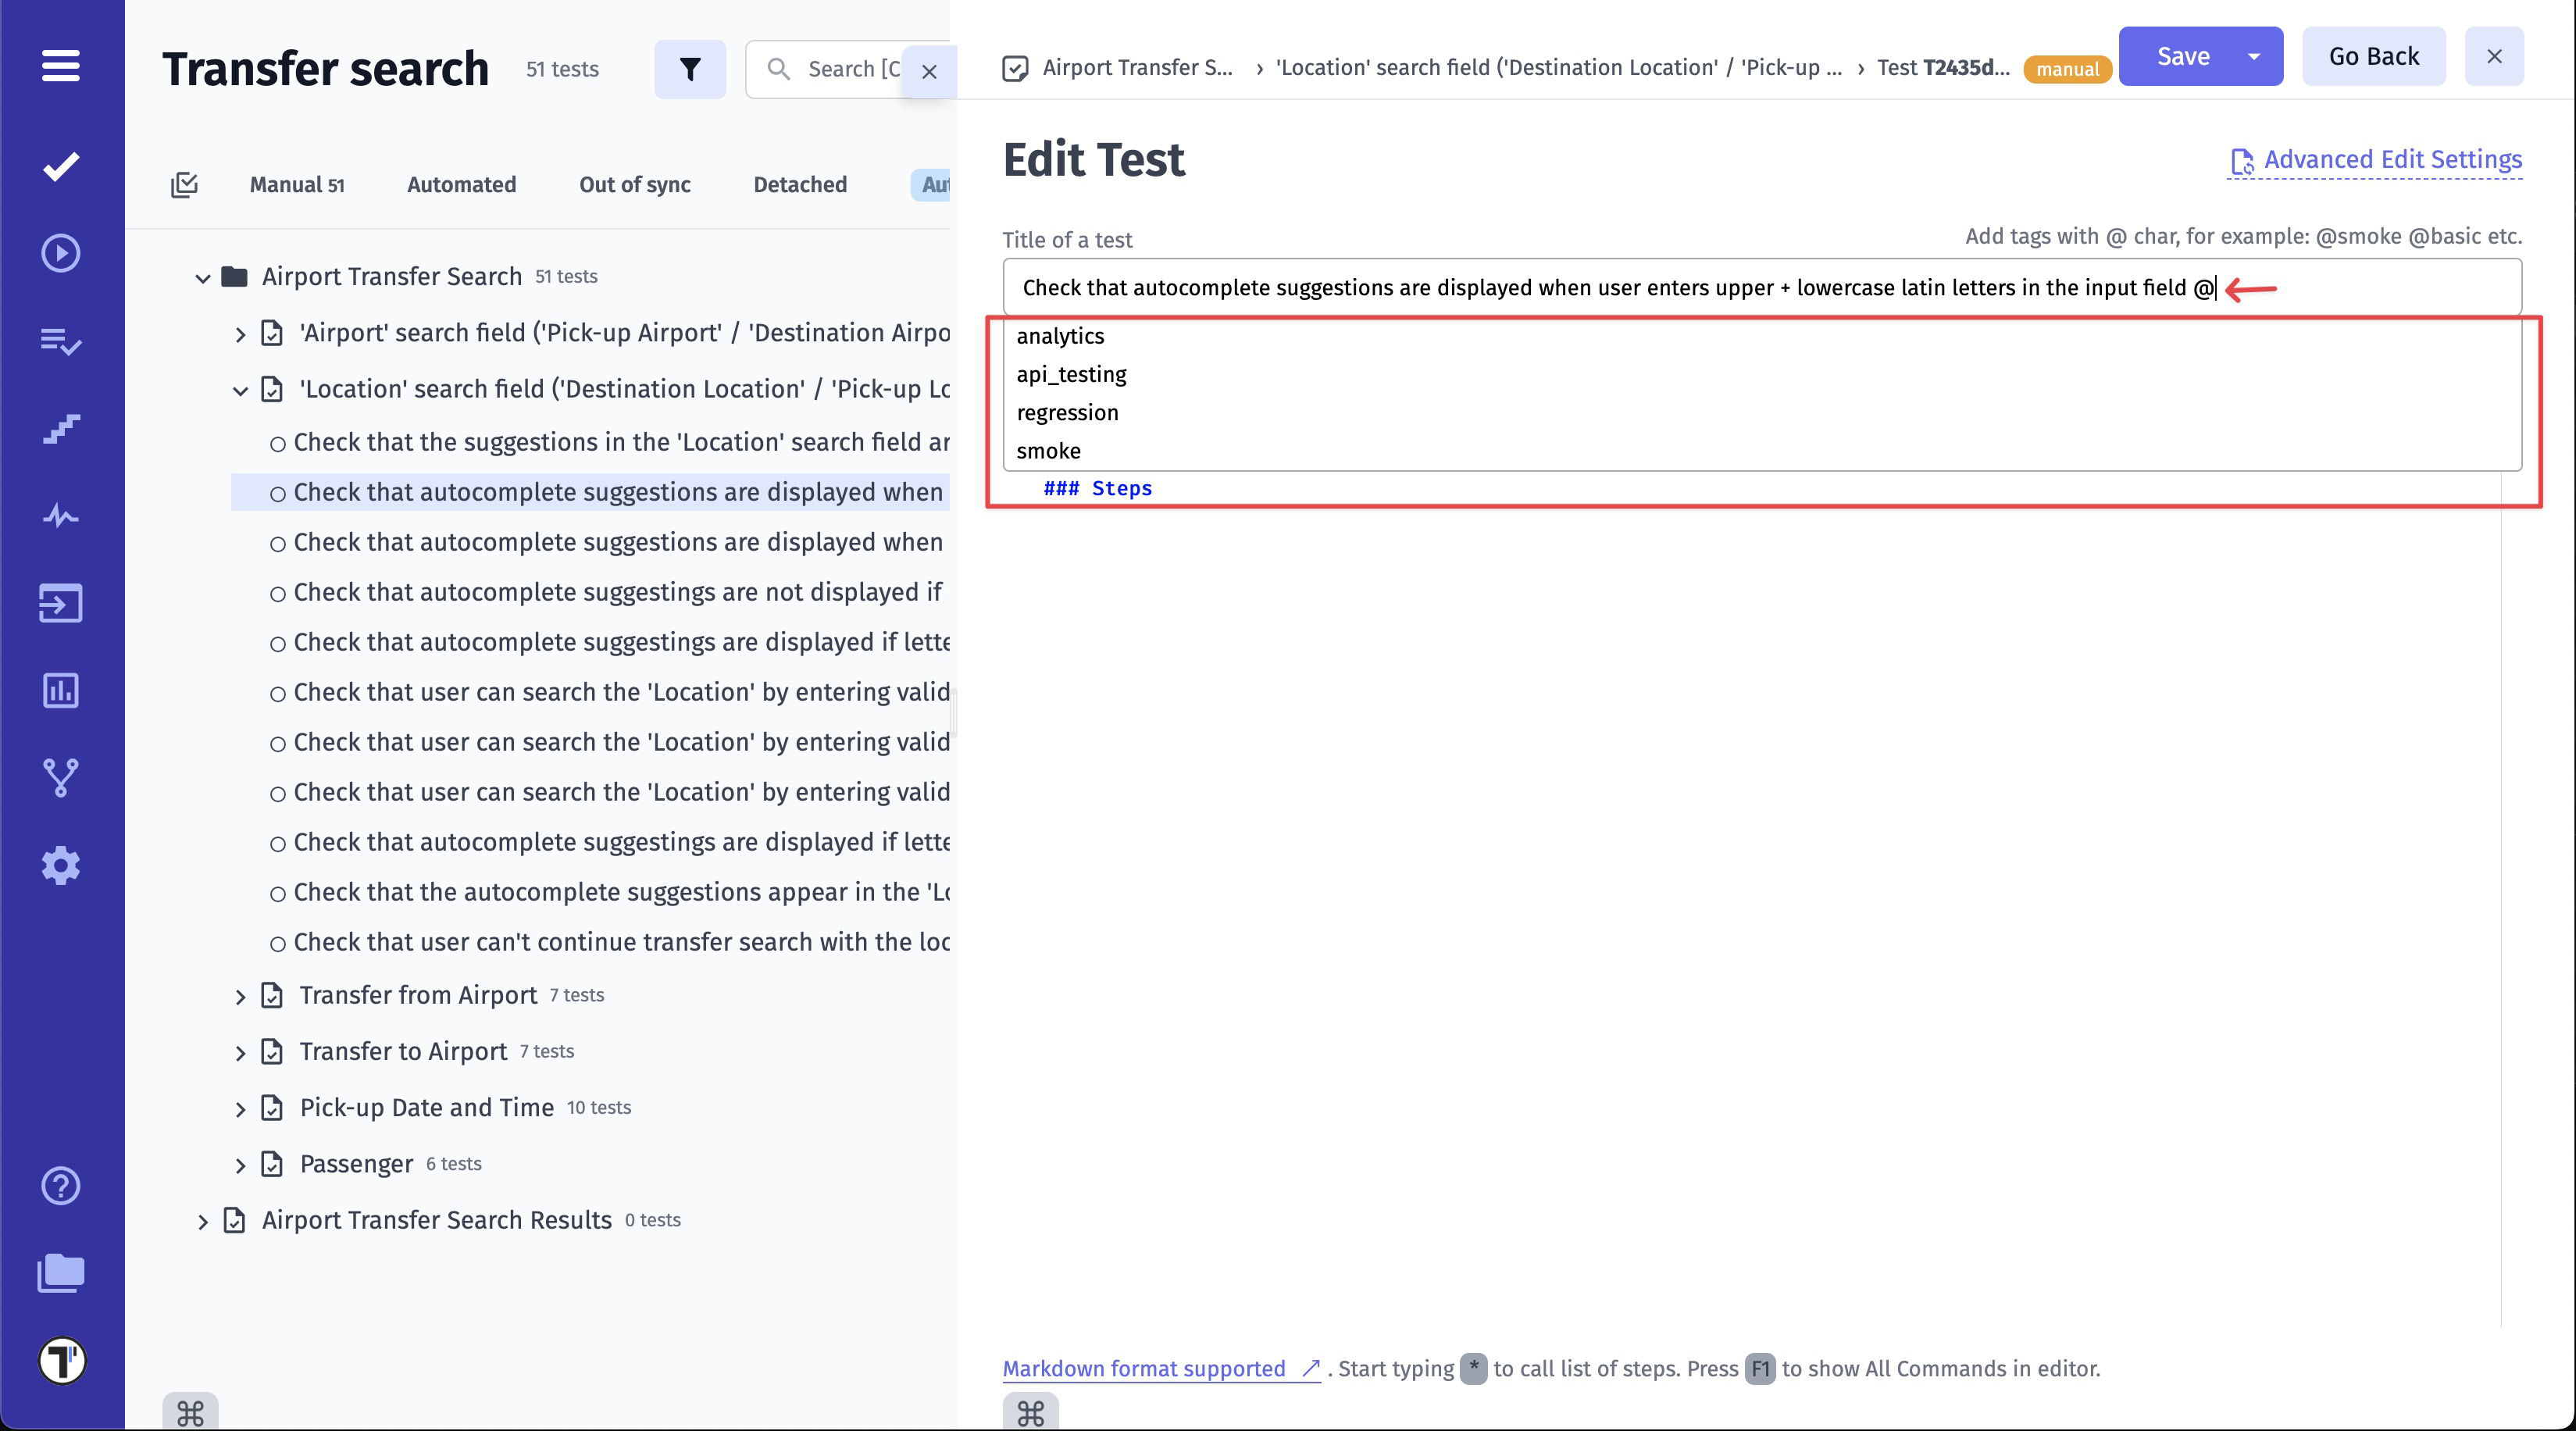
- Open Test Case/Suite.
- Click the Edit button.
- Create tag starting with @ symbol, directly within the Test Case or Suite title.
- Click the Save button.
All previously created tags are automatically saved in the system. To reuse a tag, simply type the @ symbol in the Test Case title field and select the desired tag from the autocomplete dropdown.
Create Tags via Multiselect
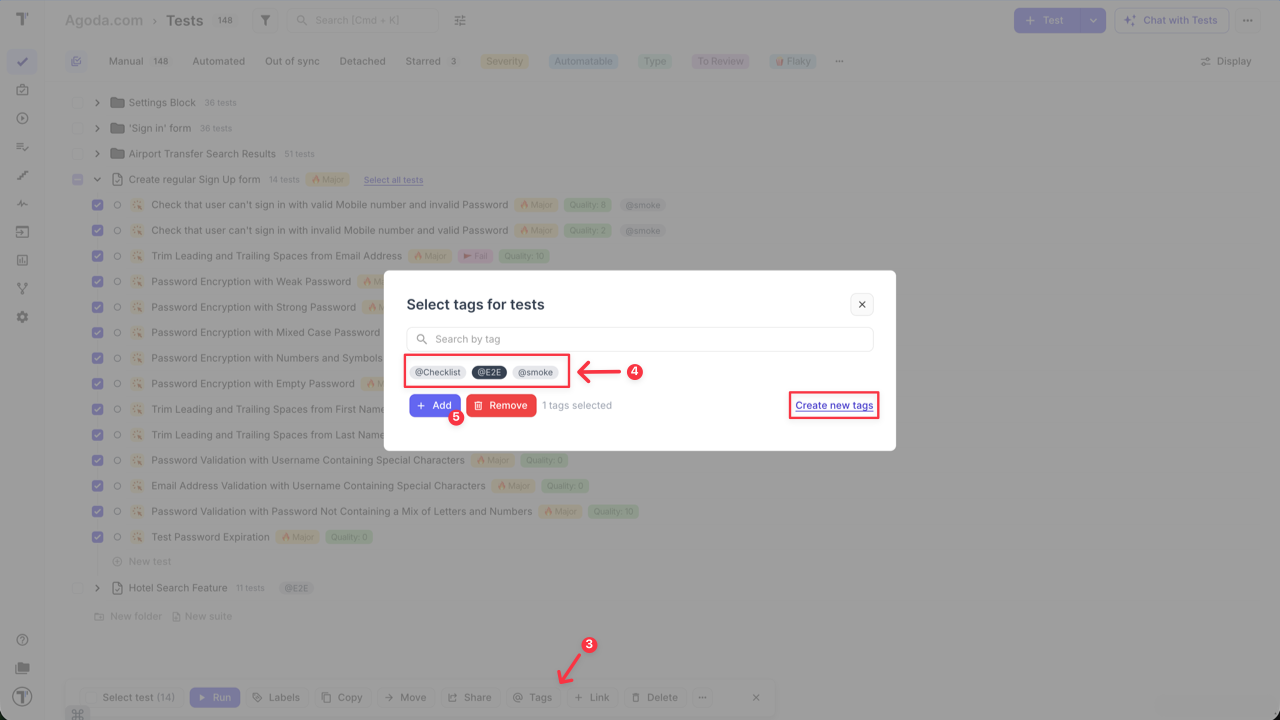
Section titled “Create Tags via Multiselect”You can also create tags for multiple Suites or Tests at once using the Multi-select feature.
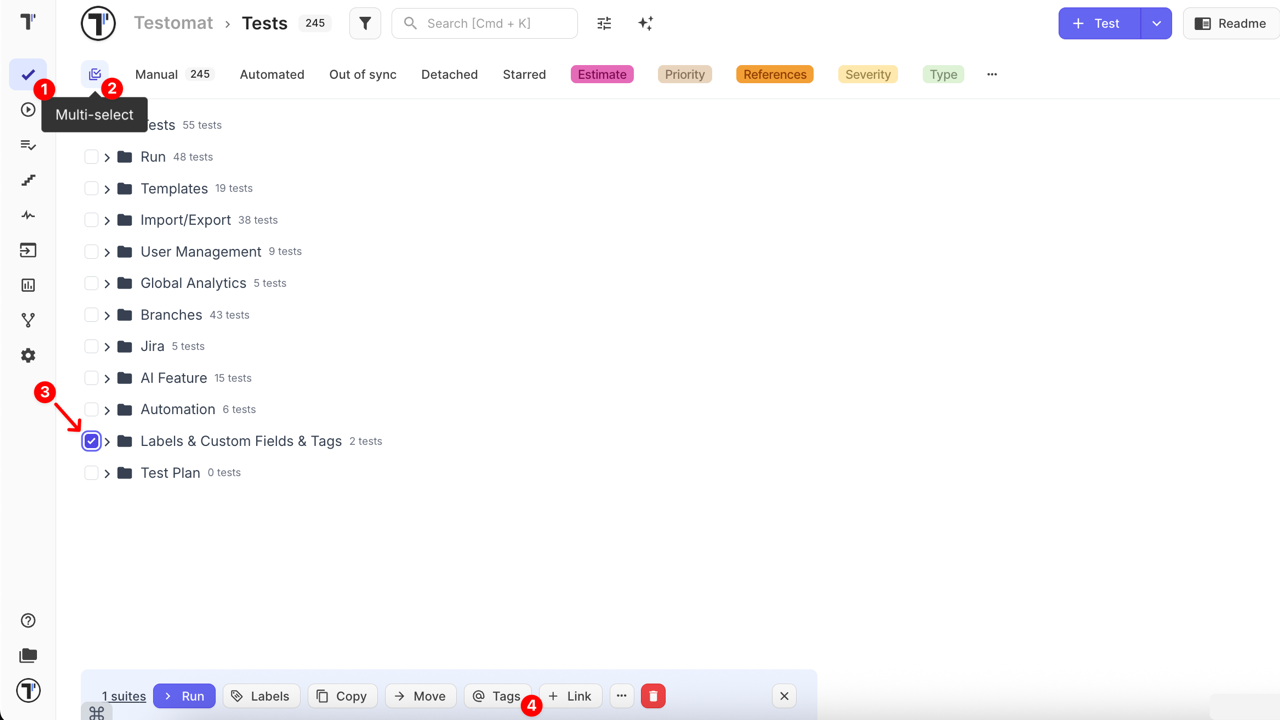
- Go to the Tests page.
- Enable Multi-select mode by clicking the Multi-select button.
- Select one or more Folder/Suites or Tests using the checkboxes.
- Click the @ Tags button in the bottom action bar.
- In the Select tags for suites window, click Create new tags
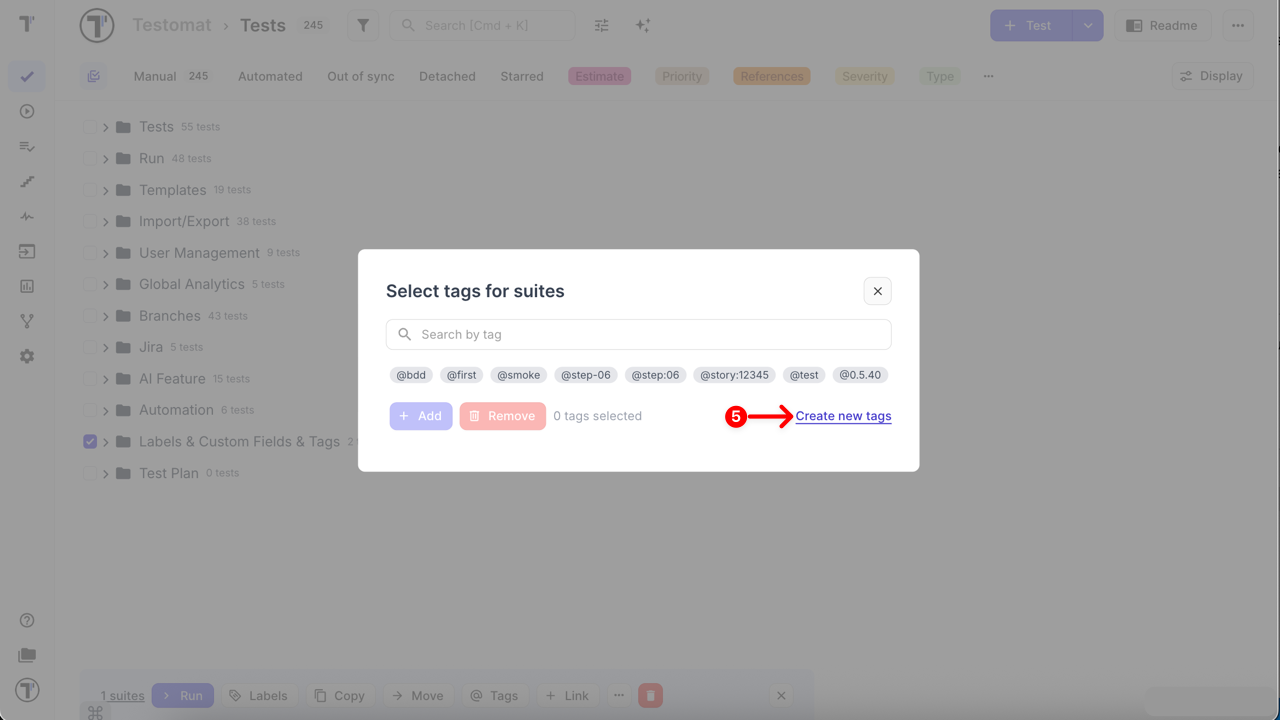
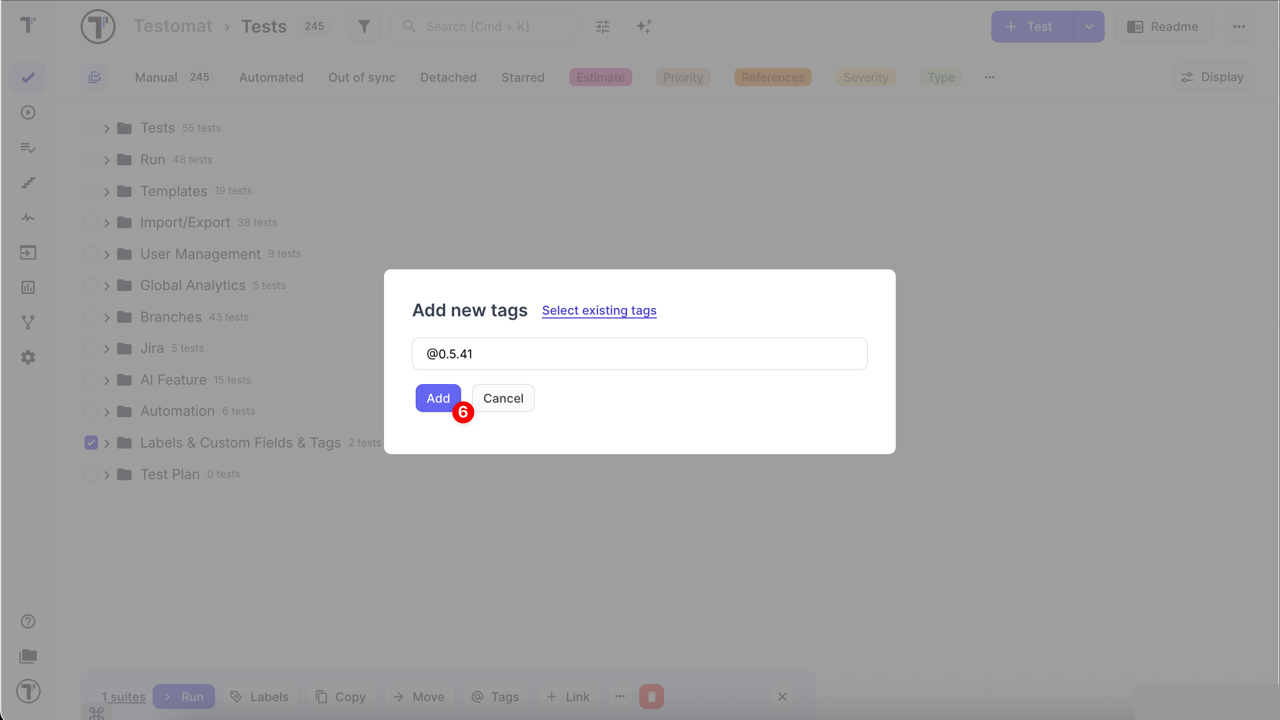
- Enter a new tag name starting with the @ symbol and click Add button
This method allows you to create and immediately apply a new tag to multiple items in just a few clicks. It helps you save time, speed up routine actions, and maintain consistent tagging across a large number of test cases or suites — without having to open them individually.
How to Bulk Update/Remove Tags
Section titled “How to Bulk Update/Remove Tags”Using the same Multi-select feature, you can manage tags for multiple Folders/Suites or Tests at once — adding or removing tags in bulk.
- Go to the Tests page.
- Enable Multi-select mode by clicking the Multi-select button.
- Select one or more Folder/Suites or Tests using the checkboxes.
- Click the @ Tags button in the bottom action bar.
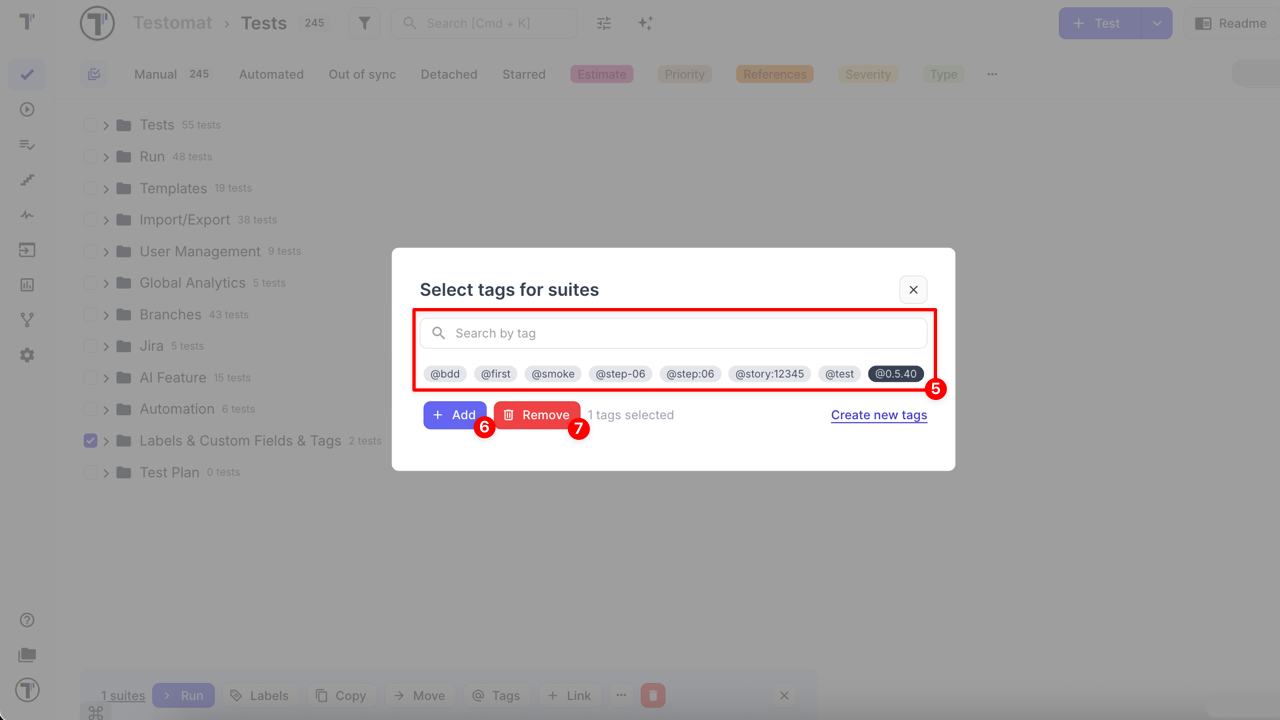
- In the Select tags for suites window, choose the tag(s) you want to manage:
- To assign a tag, search for it and/or select it from the list.
- To remove a tag, search for it and/or select it from the list.
- Click Add to assign the selected tag(s).
- Click Remove to delete the selected tag(s).
This method allows you to efficiently manage tags across multiple items, ensuring consistent organization and saving time.
Managing Inherited Tags
Section titled “Managing Inherited Tags”Tags applied directly at the Suite or Folder level follow a ‘top-down’ rule:, all nested elements (child Suites or Tests) automatically inherit these tags. Because these tags belong to the parent, they cannot be deleted from individual child tests. You can only remove the tags at the same level where they were originally applied.
To ‘remove’ an inherited tag from a single test, you must follow these steps:
- Remove the tag from the Parent:
- Navigate to the Suite/Folder details page.
- Click ‘Edit’ button (or double-click on suite title).
- Remove the tag on Suite level.
This will remove it from all nested items.
- Re-apply to specific tests: If the other tests in that suite still need the tag, you must re-apply it to them individually or via Multi-select. For multi-select:
- Enable Multi-select mode by clicking the Multi-select button.
- Select one or more Tests using the checkboxes.
- Click the @ Tags button in the bottom action bar.
- Select tag from the list or create a new one.
- Click ‘Add’ button.
Bypassing Inheritance: Bulk Tagging at the Test Level
Section titled “Bypassing Inheritance: Bulk Tagging at the Test Level”If you want to tag every test in a suite but maintain the flexibility to remove them individually later, apply the tag to the Tests directly rather than the Suite itself:
- Enable Multi-select mode by clicking the Multi-select button.
- Click ‘Select All Tests’ option.
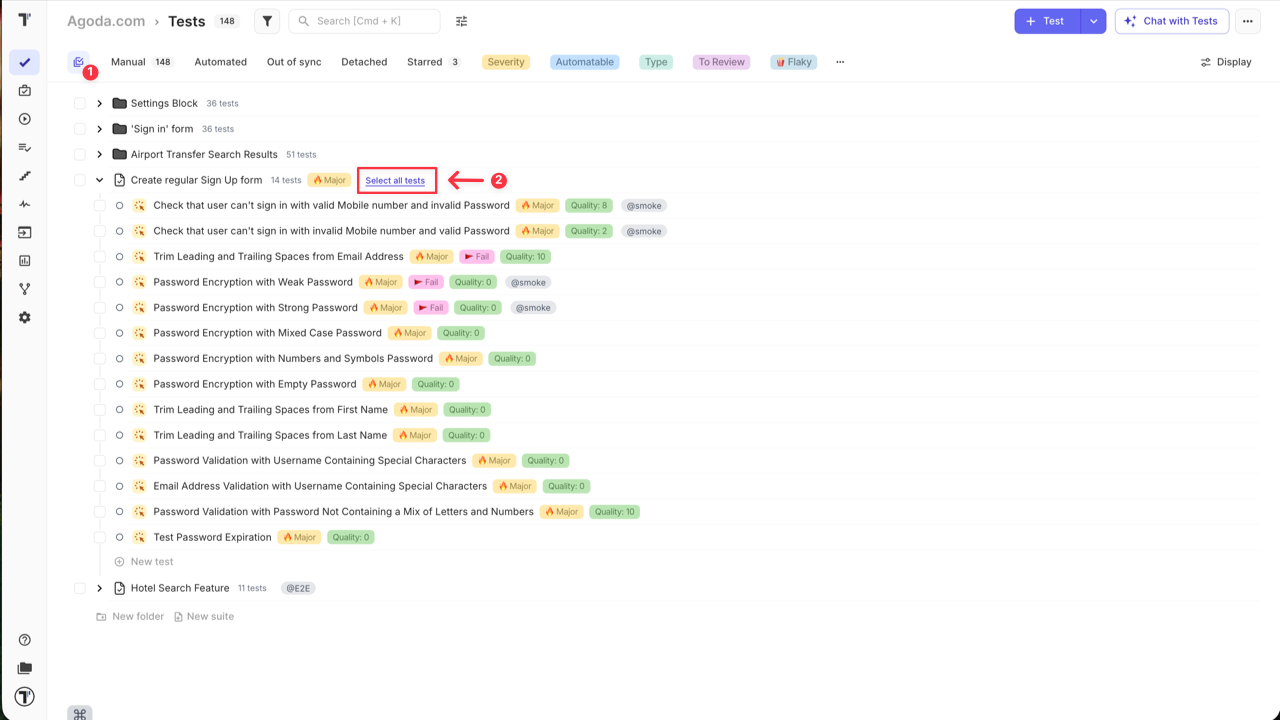
- Click the @ Tags button in the bottom action bar.
- Select tag from the list or create a new one.
- Click ‘Add’ button.
This method ensures the tag exists on the test level, giving you total control to add or remove it from any specific case at any time.
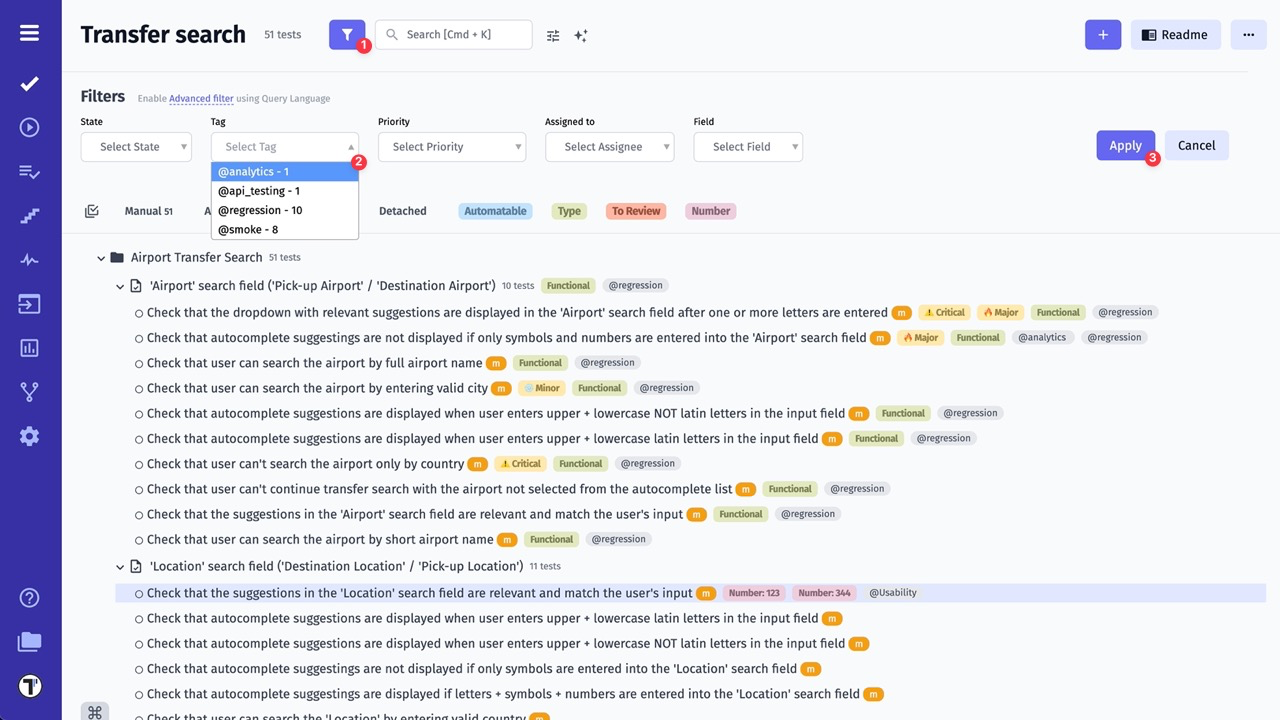
How to Filter by Tags
Section titled “How to Filter by Tags”- Enable Filters
- Select one or a few Tags from Tag dropdown list
- Click Apply button
Tag Extraction Rules in Titles
Section titled “Tag Extraction Rules in Titles”When writing titles, Testomat.io automatically detects tags marked with the @ symbol. However, not every @ occurrence is considered a valid tag.
Below are detailed examples showing when tags are recognized and when they are ignored.
✅ Valid Tag Examples
"title with a simple @tag and some other @tag1"→ tags: ["tag", "tag1"]
"@tag1 supertitle with leading tag and @tag inside title"→ tags: ["tag1", "tag"]
"title with commed taglist @tag1: @tag2."→ tags: ["tag1", "tag2"]
"title with commed taglist @tag1, @tag2.asd"→ tags: ["tag1", "tag2.asd"]
"title @tag1. zxc"→ tags: ["tag1"]
"title @tag1.asd zxc"→ tags: ["tag1.asd"]
🚫 Ignored or Invalid Tags
"title with email test@test.test"→ tags: []
"some_text_@tag"→ tags: []
"some_text-@tag"→ tags: []
"some_text*@tag"→ tags: []
➕ Math Operators in Tags
"title with commed taglist @tag1+@tag2=@tag3"→ tags: ["tag1"]
"title with commed taglist @tag1-@tag2=@tag3"→ tags: ["tag1"]
"title with commed taglist @tag1*@tag2=@tag3"→ tags: ["tag1"]
"title with commed taglist @tag1=@tag2=@tag3"→ tags: ["tag1"]
"'title @tag1=:-.( asd"→ tags: ["tag1"]
"'title @tag1=:-.) asd"→ tags: ["tag1=:-.)"]
🔗 Tags Inside and Outside Brackets
Outside brackets (ignored):
"some_text (sometext)@tag1 [sometext]@tag3"→ tags: []Inside brackets (partially detected):
"title (text @tag1)asda other text"→ tags: ["tag1)asda"]
"title (text @tag1) asda"→ tags: ["tag1)"]
"title (text @tag1( asda"→ tags: ["tag1"]
"title [text @tag1]asda"→ tags: ["tag1"]
"title [text @tag1] asda"→ tags: ["tag1"]
With these rules, you can better understand how tags are parsed from titles and avoid common pitfalls such as emails, operators, or invalid symbols.
Best Practices for Using Tags in Titles
Section titled “Best Practices for Using Tags in Titles”To ensure your tags are recognized consistently and remain easy to manage:
- Use simple words → keep tags short, lowercase, and descriptive (e.g.,
@smoke,@regression). - Avoid special characters → symbols like
+,-,*,_, or=can break parsing or truncate tags. - Don’t use emails or URLs → anything in the form
name@domain.comis ignored. - Separate tags with spaces or commas →
@smoke, @uiis correctly detected, while@smoke@uimay not be. - Prefer placing tags at the end of titles → improves readability and reduces the chance of misparsing inside brackets or punctuation.
- Keep consistency across your project → agree on a common set of tags within your team to make filtering and reporting easier.